
For some time now I’ve been thinking of starting a blog about some of the things I’ve been working on and learning. It is good practice to record things we’ve done and learned and share them with others, and I wanted to give this a go myself. However, there always seemed to be something more important to do so I hadn’t got round to starting one. But recently I found some time to look into this.
I knew there were a few things I wanted from a blogging system:
- a clean and simple look
- support for my custom domains
- ideally use markdown
- minimal effort to maintain
- preferably free
- some sort of sensible version control
I have a few personal domains that I own and so I wanted to use one of these rather than a provider-specific one. Also, I tend to write a lot of documentation in markdown and so I ideally wanted a blogging system that allowed me to generate content in that format.
I initially looked at Wordpress.com and Blogger.com. They are both very widely used blogging platforms. However, blogger.com seems to support only limited features for customising a blog and lacks many of the features available in other platforms. Wordpress.com on the other hand is a full-fledged CMS with all the features you are ever likely to need. However, hosting a blog here requires a paid-for plan. As I was only getting started with my blog this was something I wanted to avoid.
GitHub Pages
GitHub Pages has been around since 2008 as a way
for users to create custom websites. With GitHub Pages, content is published
automatically from a git repository to GitHub’s github.io webservers. It is
available for free on public repositories for individuals under the GitHub Free
plan, but is also available for private repositories under their paid for plans.
GitHub Pages uses Jekyll behind the scenes to generate site content. Publishing content is really simple; changes are published automatically whenever a change is pushed to a particular branch of a git repo. There’s no need for a separate deployment tool such as Travis, nor are there any credentials to worry about. And your content is version controlled in a git repository, which for me is a big plus.
It is pretty simple to get started with GitHub Pages. First step is to create a git repository to use as the source for the site. In my case, I gave my repo the same name as the URL of my blog.
Once you’ve created your repo, you can enable Pages from the Settings tab:

Scroll half way down and you will see a GitHub Pages section.
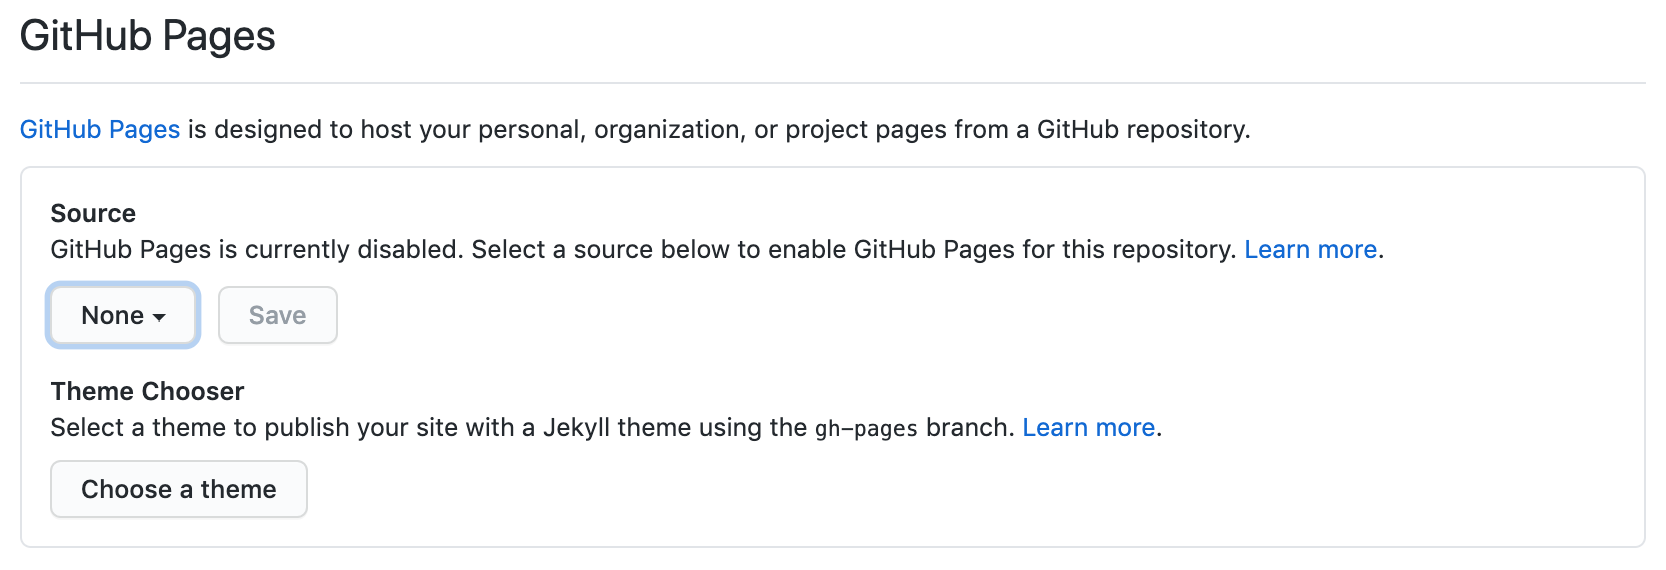
Enabling GitHub Pages is as simple as selecting a source branch to publish from. Any content on this branch will be published to GitHub’s web servers and will be available as https://username.github.io, where username is your GitHub username.
Picking a theme
Once you’ve enabled GitHub Pages on your repo you will have the option to choose a theme to customise the look and feel of your site. GitHub Pages supports a number of Jekyll themes and you can choose one of these from the Settings tab of your repo, which is a great option if you want to get something up-and-running quickly and don’t want to have to learn how to use Jekyll.
However, you are not limited to the themes provided by the Pages theme chooser,
you can use your own custom Jekyll theme. Jekyll has a standard directory
structure for where to place
markdown-formatted content and layouts and if you follow this pattern you can
use just about any Jekyll theme. All you need to do to apply the theme is to run
the jekyll build command. However, GitHub Pages does this for you during its
publishing process so you don’t even need to do this!
For my site I decided to use the Reverie theme by Amit Merchant. The theme is simple and clean and is designed for blog sites. All the CSS and layouts for the theme are stored within the repo so this allowed me to customise the theme to my own liking.
Jekyll allows you to view how your site will look before you commit and push to
your repo. If you run bundle exec jekyll serve --drafts Jekyll will serve your
site from a local endpoint. The --drafts option will make Jekyll serve any
draft blog posts you may have in your _drafts directory. These are ignored by
the jekyll build command, and so is a nice way of storing draft posts that are
not ready to be published.
Adding a custom domain
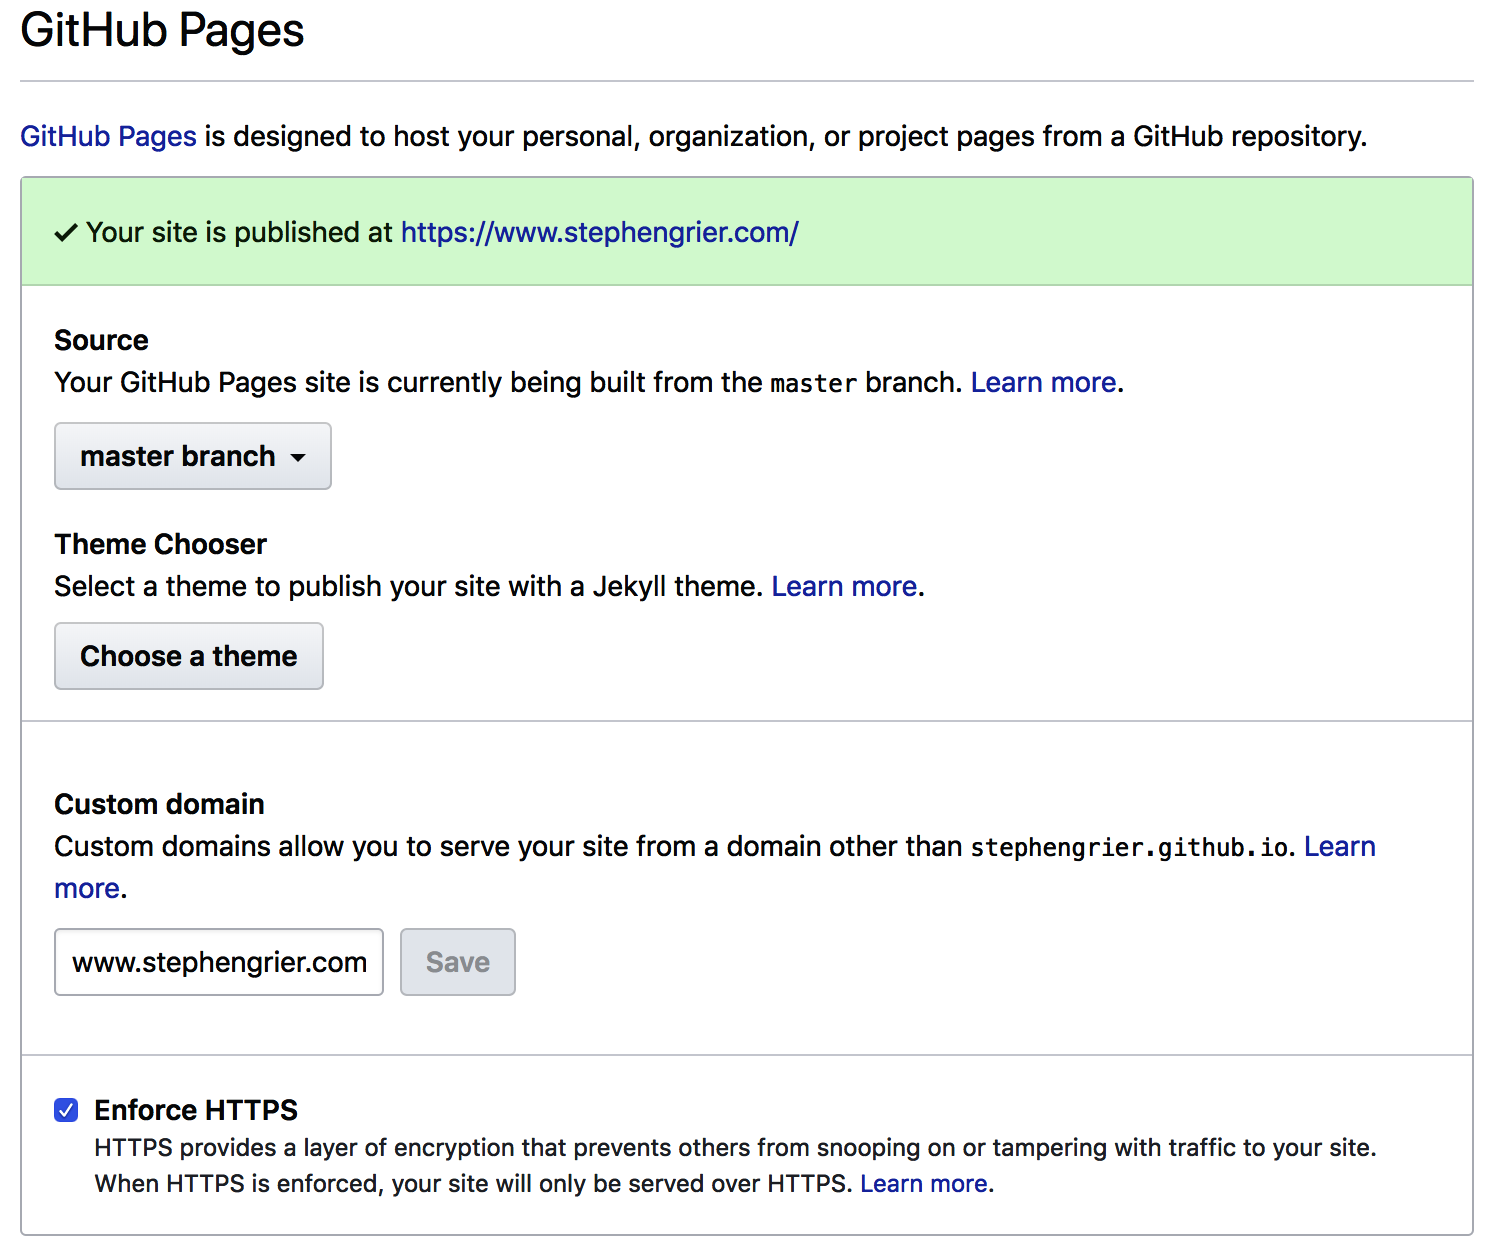
By default GitHub Pages makes your site available as https://username.github.io. However, one of the nice things about GitHub Pages it that it also supports custom domains. They even take care of obtaining a valid TLS certificate for your domain using Let’s Encrypt!
Configuring a custom domain with Pages is really simple and just a case of
adding the domain you want to use to the GitHub Pages section of the repo
Settings tab.
Once you’ve added your custom domain here it will be added as a virtual host on
GitHub’s servers and the site will no longer be available under the
github.io domain. However, you now have to configure the DNS record for your
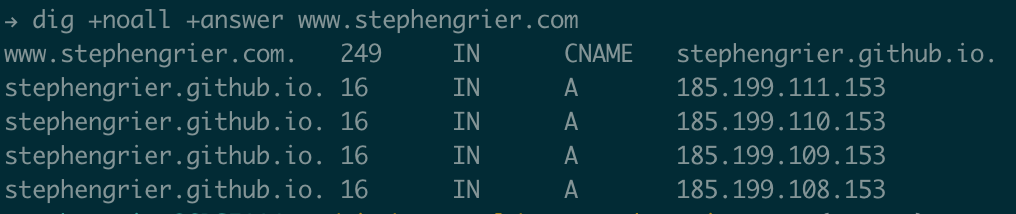
custom domain name to resolve as a CNAME to username.github.io.
How exactly you do this depends on your domain and DNS provider, but once you do
you should end up with something like this:
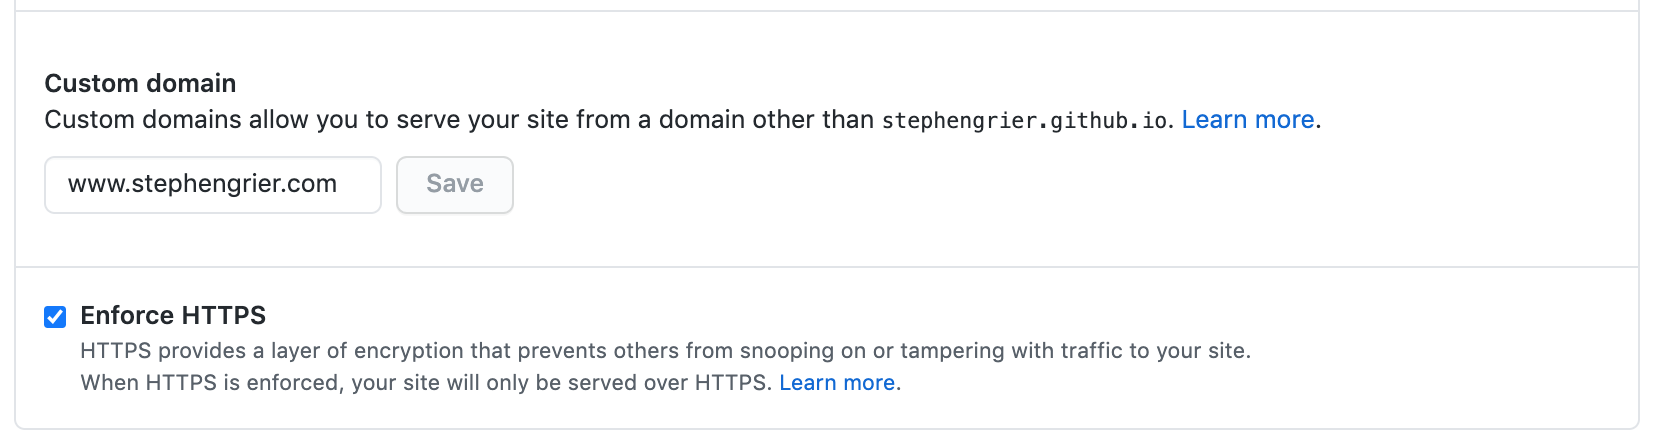
Enabling HTTPS on your custom domain
Probably the nicest feature of GitHub Pages is that proper TLS certificates are provided on custom domains. The Let’s Encrypt Certificate Authority is used for this, meaning not only do you get a proper CA-signed certificate (not a self-signed or a wildcard one), but the whole process happens behind the scenes so you don’t have to request one or configure it yourself. Renewals are taken care of for you too. Awesome!
However, this didn’t work for me initially. You need to have the DNS CNAME set
up correctly before you click the Enforce HTTPS option, otherwise the
certificate won’t be issued correctly. In my case GitHub seemed to have cached
the DNS response before I changed the DNS record and they didn’t pick up the
change until the TTL expired 24 hours later. Save yourself some pain and set up
the DNS record correctly before you select this option!
Final thoughts
If you are running a blog site for a small business and care about visibility and SEO features you may well want to look at a platform that provides a rich feature set such as wordpress.com. However, if, like me, you just want a simple blog with simple styling at little or no cost and you are comfortable using git and a static site generator like Jekyll then GitHub Pages is a great option. The ability to version control my blog content in git is a major plus for me, and the support for custom domains and proper TLS certificates from Let’s Encrypt is a clincher.
I found the whole process of publishing a site with GitHub Pages really easy and enjoyable, so if you haven’t tried it already I’d recommend giving it a go.